What is Jux?
It's amazing what you can find when you go onto social networking. I was browsing some of the posts on twitter and came across a little gem. Jux is a blog tool that has some really great features. It is fully centred around the visual approach to blogs. It is possible to create highly attractive blog posts very quickly with a really easy to follow user interface and different styling options. One thing I have learned in my role as E-Learning Developer is that teachers don't want to spend a lot of time learning complicated processes to complete a task and Jux will deliver the results they want with an extremely easy to use tool set. |
| The Jux user interface is a simple pick-and-click approach. |
How it Works
 |
| You can see changes as you edit the pre-made template. |
When you sign up for a Jux account for the first time you are immediately asked what type of content you want to create. Each element has a template already attached so you can instantly see what it will look like as you work through the design.
There is a floating edit box with simple options to help you create your post and the changes you make are kept within a set design approach that is designed to always look good.
What this does mean is that you can't make dramatic edits to set it exactly as you want it to look. However, as I said earlier, this is designed for ease of use and now as a professional image and text editor.
 You can easily change the position of the image and text within the blog using the simple interface. Changing the photo size and article position makes dramatic changes to the way your post will look. For example, when you place the article in the centre the image is placed in line with the text underneath the title. Selecting a large image places the text within a floating box.
 The selection of fonts are designed to be complementary to the style, so header fonts are different from body text fonts. These fonts are also more varied than standard web fonts and you can make some really professional looking designs by selecting the appropriate fonts. There are also other options such as 3D text and blur effects, as well as neon glow, which can help to make the style you want. Of course this is still not the same as a professional editor, but the results can look great.
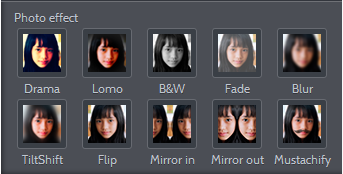
 There are also several effects that you can apply to your pictures to give them a different look or feel. Many of these are fairly standard, although I am surprised that there is not a sepia option. Multiple effects can be selected for a single photo and this gives you quite a few options to change the way your image appears. (I haven't yet managed to get Mustachify to work and I assume you need a portrait for best results).
 You also have the option to share your posts through many different options. On an open post it is possible for viewers to share to Twitter, Facebook or via Email. I haven't worked out if it is possible to turn this option off, but I am sure most people want their blogs to be public and viewed by as many people as possible. This could cause a problem if you are planning to use this to upload work that is for grading privately. It is worth informing students of this and perhaps writing a disclaimer or adding copyright information to each post.
 You can also share through the edit screen and this has Facebook, Twitter and Email options but there is also an embed option. This means you can create a post and then embed it into another website or your VLE. This makes the creation of highly visual and rich content extremely simple and negates the need to learn HTML and CSS coding to make something that looks beautiful in your courses on your VLE.
What this does mean is that you can't make dramatic edits to set it exactly as you want it to look. However, as I said earlier, this is designed for ease of use and now as a professional image and text editor.
Creating a Post
Post creation is done through the floating editor. The editor is divided into different sections. The first section deals with the content. Here you can write any text you want to appear and select the image/s you want to include on the post. The next section deals with the style of the elements including some simple picture effects and text effects. Finally there are the set options which allow you to choose what extra information is included on the page including author and the large Jux icon.Changing the Layout

Editing Text

Photo Effects
Images within the Text
It is possible to put images within the text you write using HTML code. In fact you can use HTML and CSS to design your text area the way you want. I haven't tested this fully but I don't get the impression that this is a full HTML editor; simply another way to design your content the way you want.Your Posts
 |
| Posts are grouped together in creation order. This process is done by the website and editing options are very limited. |
Once your posts are complete they are added to your home screen. You have limited editing options for this screen and the site decides where it places your posts. However, the layout actually looks really nice. You end up with a very visual front page with the option to click on a post and see it full screen.
Sharing Your Posts

Conclusion
I am fairly impressed with the results you can get from this blog tool. It is very easy to use and does a lot of the hard work for you. I would like to see more options to customise the size of embedded content. I also feel that having the ability to create link only access to a blog post would allow you to do more with embedded content. I could see this being used as a simple way to create a scrolling banner for a web page.
Despite this wishlist I feel it is going to be an excellent way for people to share their visual work. I wasn't very impressed with the results I saw from the general public as most of it was low quality with quotes that weren't well thought out, but I can imagine that visual students with imagination could create some wonderful content to share.
nice post thanks for the info..
ReplyDeletee learning development